 Skull of modern human (Homo sapiens), reconstructed from CT scan of original specimen using 3D Slicer 3.4. Data from OUVC 10503, downloadable at the WitmerLab web page.
As the headline says: data or hypothesis? Discuss.
 Skull of modern human (Homo sapiens), reconstructed from CT scan of original specimen using 3D Slicer 3.4. Data from OUVC 10503, downloadable at the WitmerLab web page.
 Then, click on the "Save" tab, to expand this option. Hit the "Save Model" button.
 Choose the name and location for your file, hit save, and you're done!
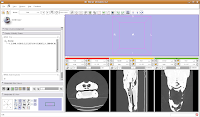 For ease of viewing, I changed the window and level settings under the Modules section of the toolbar, by selecting "Volumes". In the Volumes section that pops up, hit the display tab. Now, you can adjust the window and leveling options. I used settings of 1600/250 (you can type this in the dialog box). As you'll note, the bone and flesh will stand out more crisply now, versus the default settings.
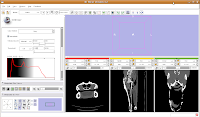 Now, let's switch to a single slice view, for the red slice (it's labeled as the axial slice here). Zoom in an appropriate amount, to get a better view of what's going on.
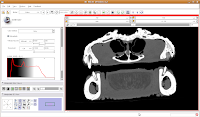 The white areas are bone and teeth, the gray areas are flesh (muscle, skin, fat, etc.), and the black areas are air. Note the nasal passages and sinuses in the middle of the skull. Areas of air elsewhere (such as in the lower jaw) are probably due to a mild amount of decomposition after the death of the animal (yes, this is only a severed gator head, not a live animal).
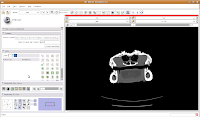 Next, let's threshold the label so that only the skull is highlighted. Click the "threshold" button, and adjust it to something that gives you a good picture of the bone. I found a lower setting of 300 and the default upper setting for the range did pretty well in my book.
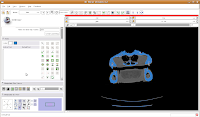 Do note that if you're using your reconstructions to measure things like volumes, surface areas, etc., you'll want to be very careful about how you threshold (reasons behind this could fill another post altogether). For the purposes of our reconstruction to just show morphology, it won't make much of a difference.
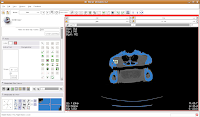 Once we've changed those options, click on a blue area within the jaw. Your computer will chug along for a few moments (the speed of the chugging depends largely on the speed of your processor--a faster computer is always better, regardless of what data analysis program you are using), and then you should notice a major portion of the label map turn red. The gantry and a few other isolated flecks remain blue (label map value "1").
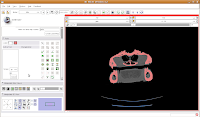 Next, go to location 60 (type it in the dialog box towards the upper right corner of the screen, and hit enter). Towards the bottom of the gator head, you'll see four blue areas. These are the hyoid bones. Let's segment them in a peach color (label map value "2"). It is helpful to zoom in a bit, to make click placement easier. As before, change the label color to "2", and click on each of the four islands of pixels, one at a time.
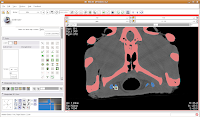 Your computer will chug along again, and then you should have the hyoids segmented out pretty nicely. It is a good idea to segment each segment of the hyoid individually--that is, wait for the color on one to change before clicking on the next. This will avoid disappointment if you make a poorly-placed click.
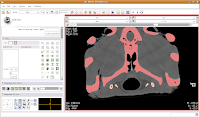 Now is a good time to save your hard work, before we move on to the next step.
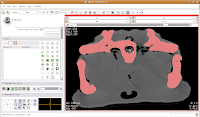 We're going to use the "change island" tool, with a twist. If we leave the scope for this tool at "All," we'll get a nasty surprise. The space of the endocranial cavity is, right now, contiguous with a whole lot of nothing. This means that trying to change everything at once would spill out into the entire label map, leaving a skull surrounded by a sea of "brains".
 If all goes well, this little area will turn green! We're on the road to a gator brain.
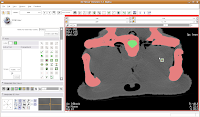 Hit the back arrow to move to the next slice. Repeat as before, for another two or three slices.
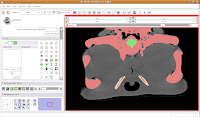 So, isolate this space. Now, scroll forward to slice 88 or so. Change the scope to "All," and click in the middle of the endocranial cavity. Once again, things will chug along for a bit. Once it's done, you can scroll back and forth and notice that the areas you had left blank are now filled in. How cool!
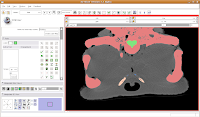 Now, let's turn our attention to slice 84. On the left side, you'll notice a little squiggly canal heading away from the endocranial cavity. In some cases, you might want to keep it. But for now, those sorts of things are just extraneous annoyances.
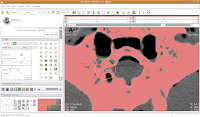 So, let's change the radius of our paintbrush. On the left side of the screen, you'll see a tool just for that. You can click on it and drag to move by integers, or enter a decimal value (in millimeters). For this slice, I found a radius of 0.25 or 0.5 to be pretty good. So, type this in the dialog box. Now, when you move the pointer over to the slice, you'll notice that the area of effect is much, much smaller.
 To block off this area, now just click and drag along the area you wish to enclose. Once you release the mouse button, you'll notice that a little green section is now in place.
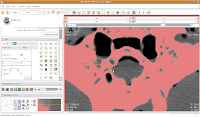 If you made a mistake, just hit the "undo" button in the lower right corner of the editor toolbox.
 Making Some Progress
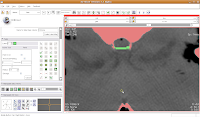 Then, go back and use the change island tool to fill in all of the slices for the brains. Once you've done that, save your work.
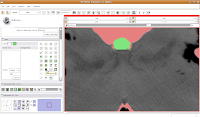 This will create a model for the label map currently selected (in this case, the #6 green). The model maker will run in the background for awhile--you'll see a little progress indicator at the bottom of the screen.
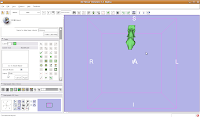 If you're lucky, you'll see your first digital endocast! If the model isn't visible, it's probably because it is still processing. Once the model shows up (this might even take up to a minute or two), you can click and drag to change the orientation.
 Finishing Up


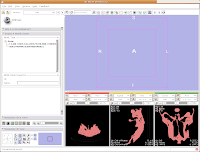 Click on the "Modules:" button on the toolbar, and go down until you find "Model Generation." Another little submenu comes up, and click on "Model Maker." Now, the left-most side of the Slicer screen will change to show the "Model Maker" parameters. We'll want to change a few of these in order to get going.


 Looking at the model
 Now, let's make our ankylosaur skull a more "natural" color. Under the "Modules:" drop-down toolbar at the top, select "Models". The bar at left will change, and you'll see a whole new set of options.

 This brings up a whole new dialog box, with a world of colors! On the area at right, you can drag around to find a new color. Alternatively, if the choices overwhelm you, there is another way. You'll notice a few tabs above the color palatte. Click on the one that brings up the "Basic Colors" option. A much more limited set of options now appears.


 You'll see a pulsating red overlay on the CT scan image at right. . .everything that is in red will be segmented if you hit the "apply" button. But, you'll notice that lots of unnecessary junk is highlighted. To get rid of this, you use the slider bars at the left side of the screen. Just like with the windows and level dialog, you can also type in numbers. Slide the bar around until only the skull is highlighted, but not the CT gantry at the bottom of the image, or the air, or anything else. If found good results around a minimum of 560.51 and a maximum of 4691. While you play with this, you can slide back and forth through the stack, to see how the threshold works for the entire skull. You may have to adjust to find something that works throughout.


