The following article was written prior to Windows 11’s release on 5 October 2021. Microsoft’s new OS is now available for everyone to download, and there’s no need to join the Windows Insider Program to access it – here’s how.
However, it’s still where you’ll find new features first. Microsoft regularly releases upcoming builds to the Insider Program, allowing members to test out new functionality and provide feedback. If that’s something that interests you, this article may still be of interest, although we wouldn’t recommend signing up to the experimental Dev Channel on your main device.
The original article follows below.
Windows 11 has gone from abstract concept to official announcement in a matter of weeks, and now you can try out the new operating system for yourself.
Just four days after Windows 11’s big reveal, Microsoft released the first public beta (or Insider Preview, as it calls it) to members of the Windows Insider Program. This testing period provides a crucial opportunity for the company to fine-tune the Windows 11 experience following user feedback, ahead of the expected full rollout in October.
The Windows Insider Program is open to everyone with a Windows PC and a Microsoft account, meaning you can try Windows 11 for yourself right now. However, this is an early build – some features may be missing, and bugs are likely. As such, we wouldn’t recommend installing it on your main PC.
However, if you have a spare device available, it’s a great chance to try out Windows 11 ahead of time. Without further ado, here’s how to download the Windows 11 beta now.
Check your PC meets the hardware requirements
There’s no point following all these steps if your PC won’t ultimately be eligible for the free Windows 11 upgrade. While the vast majority of current Windows 10 hardware will be supported, that’s not the case for all devices.
That’s because Microsoft has updated the hardware requirements for Windows 11. Notable changes include the need for a TPM 2.0-enabled processor (although there is a workaround), alongside at least 4GB of RAM and 64GB of on-device storage.
This counts a lot of older hardware out, including Surface PCs from 2018 or earlier. Learn more and see a full list of hardware requirements in our separate article: Will my PC run Windows 11?
Microsoft wasn’t enforcing hardware requirements when early builds were available in the Dev Channel, but that’s changed now it’s an official beta.
How to get the Windows 11 beta: Join the Windows Insider Program
The Windows Insider Program (or Programme as it’s known in the UK) is the only way to get access to this early Windows 11 build. Provided you’ve got an active Microsoft account, signing up is a simple process:
- On your Windows 10 PC, open Settings
- Head to Update & Security and choose ‘Windows Insider Program’ from the left pane
- If you’re not already signed up, click the ‘Get Started’ button

- From the pop-up that appears, click ‘Link an account’

- Choose from an account that’s already signed in, or log in with new details
- On the next screen, choose either the ‘Dev Channel’ or ‘Beta Channel’, although we’d recommend the later if device stability or bugs are a concern. Windows 11 isn’t available in the ‘Release Preview Channel’ yet
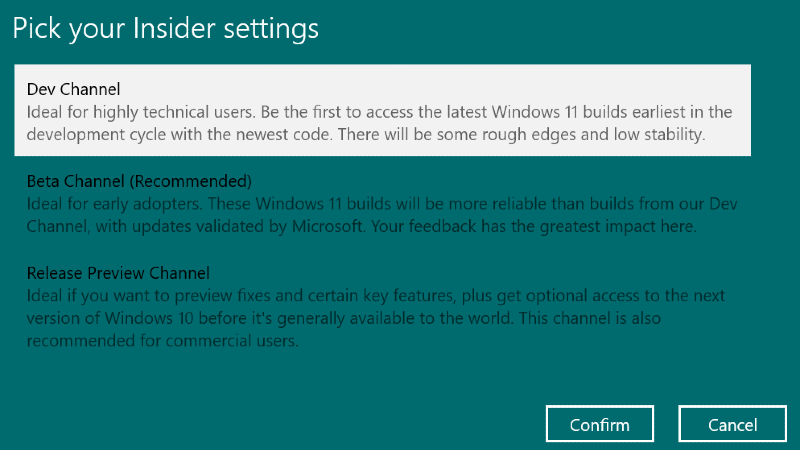
- Hit ‘Confirm’ on this screen and the next, which indicates you agree to the terms and conditions
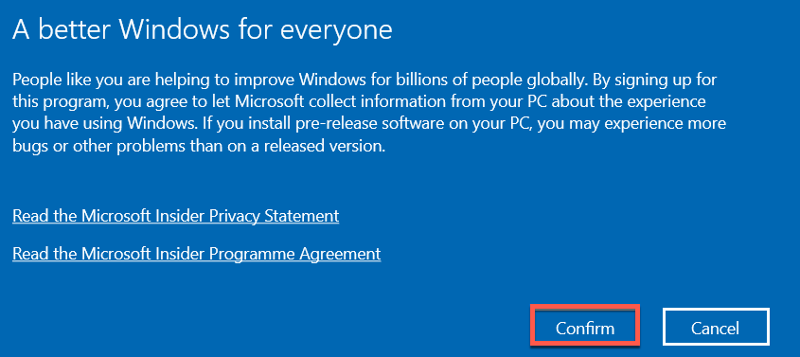
- To complete signup, you’ll need to restart your PC. Choose whether to do that now or later

That’s the hard bit done – now you’ll just need to install the beta like you would any other update.
How to install the Windows 11 beta: Download the update
Once you’re a member of the Insider Program, installing the Windows 11 beta couldn’t be easier:
- Head to Settings > Update & Security
- From the Windows Update tab, choose ‘Check for updates’
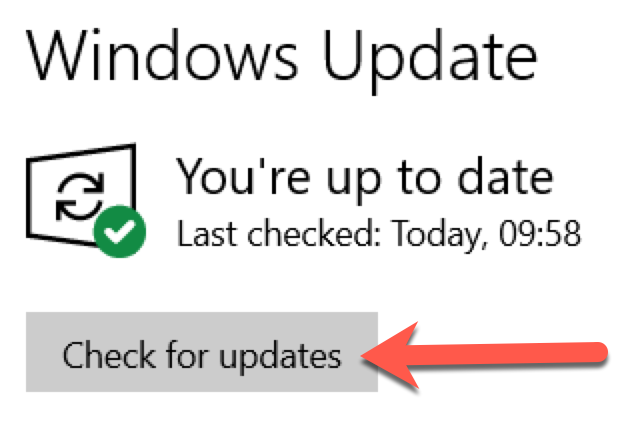
- After a few seconds, an update named ‘Windows 11 Insider Preview’ will automatically begin downloading
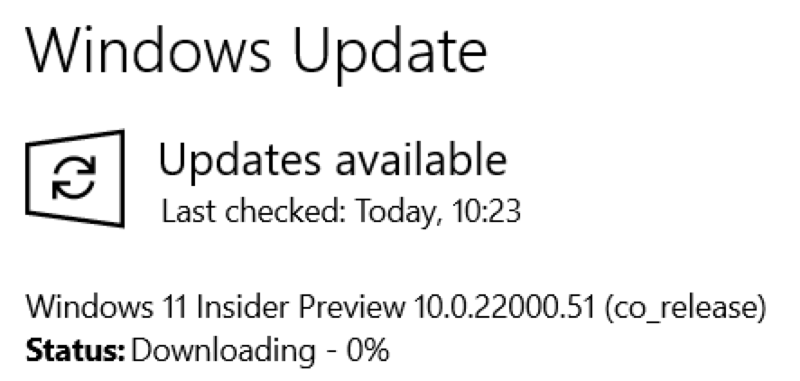
- Once it’s finished, you’ll be prompted to restart your PC. Click ‘Restart now’ to do it straight away
That’s it! Once your PC has installed the update, the Windows 11 beta will be ready to use. Don’t worry, all your apps and files will remain intact.
How to switch from the Dev Channel to the Beta Channel
Until 29 July, the Dev Channel was the only way to get access to preview builds of Windows 11. Microsoft acknowledges that these early versions can have “rough edges”, recommending them for “highly technical users”.
However, with the latest version now available in the more stable Beta Channel, many people will want to make the switch. Here’s how it’s done:
- From any Windows 11 build, open Settings
- In the top-right of the window that appears, choose ‘Windows Update’
- Under ‘More options’, click ‘Windows Insider Program’

- You should now see a ‘Choose your Insider settings’ option. Click it and then select ‘Beta Channel (Recommended)’

Your Windows 11 PC will now be switched to the Beta Channel. This is a much simpler process than usual, but Microsoft has indicated that it won’t be around for long:
We are allowing it for a short period of time. If you want to switch, now is the time. This is mentioned in the blog.
— Windows Insider (@windowsinsider) July 29, 2021
How to stop getting future Windows Insider builds
If you signed up to the Windows Insider Program just to get the Windows 11 beta, you probably won’t want every new release in the Dev Channel. Fortunately, there’s an easy way to turn them off straight away:
- From the new-look Windows 11 desktop, click the Settings cog icon in the middle of the taskbar

- This now automatically opens in System settings. From the left pane, choose ‘Windows Update’
- Click ‘Windows Insider Programme’ (or Program), one of the four main options on screen
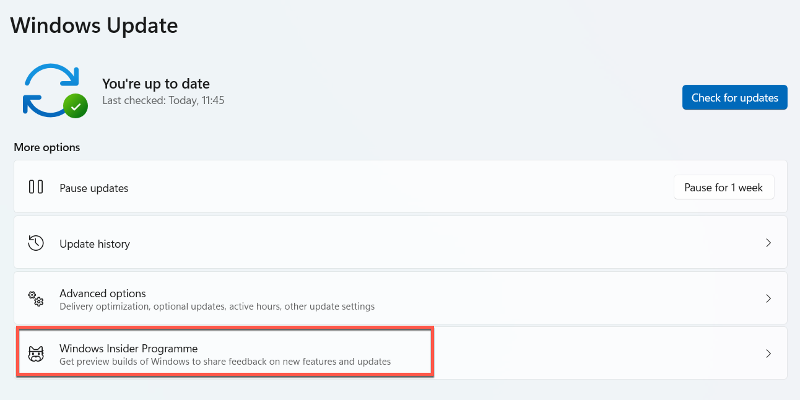
- From the next screen, click ‘Stop getting preview builds’ and then ‘Unenroll this device immediately’.
For this option to work right now, you’ll need to clean install Windows 10 back on your PC. We’d recommend not doing this, so only download the Windows 11 beta if you know you’ll want to keep it.


