Google has been constantly working towards bringing more advancement for users, especially the Pixel 9 series. The Pro model seems to have gained considerable attention due to the improved camera layout and better battery life. Many key features have been incorporated, such as the Add Me feature that allows for group pictures. However, the one that stands out the most is the Satellite SOS on the new model, which allows users to send messages in areas with poor connectivity or no cellular coverage. For users wondering how they can use messaging via satellite on the Pixel 9, we have curated a guideline for you that could let you use this truly life-saving feature.
How to use the Satellite SOS feature on your Google Pixel 9 and Pixel 9 Pro
If you have ever been in a situation where you had poor signals and wanted to reach out to either family or friends in case of an emergency case that required immediate help, you must have been through quite the turmoil. To cater to scenarios like these, Google has included the messaging via satellite feature for the Pixel 9, and it is pretty simple to use the capability. All you need to do is follow the steps given below.
Step 1: Demo the Satellite SOS feature
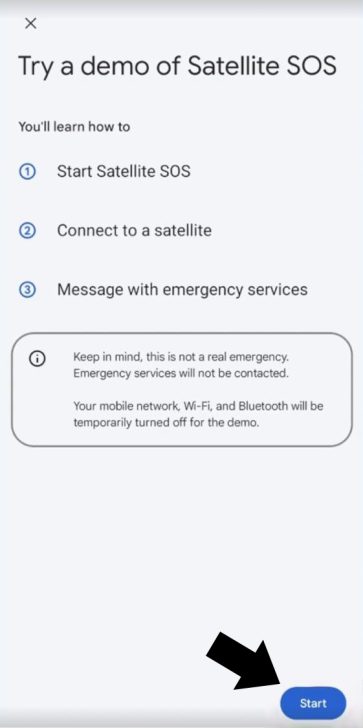
The feature is available for demo and only requires opening Settings, going to Safety & Emergency, and choosing Satellite SOS. The demo instructions would then be provided, which you can follow to go through it. In case of emergency and no connectivity, you can dial 911, and if the phone detects no network coverage, it will automatically prompt a red Satellite SOS button.
Step 2: Fill in the questionnaire
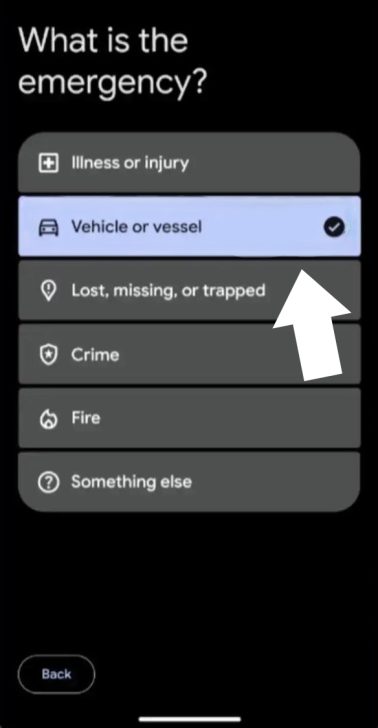
You would be presented with a set of options that you have to choose from to describe your situation. It would then have some follow-up questions, but you only have to answer those that apply to your condition.
Step 3: Notify pre-set emergency contacts
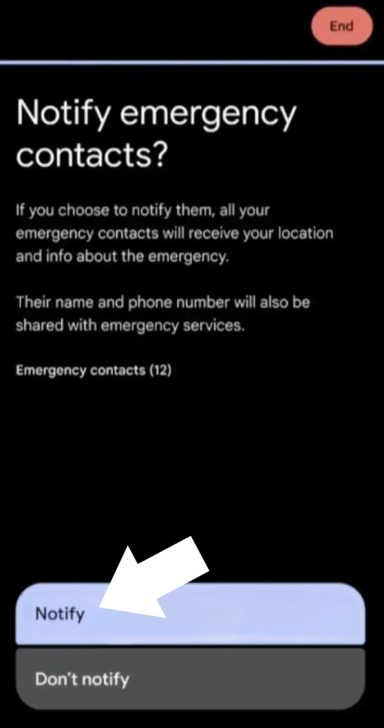
You can choose to notify the pre-set emergency contacts. If you go forward with this option, the contacts will then receive your location and details regarding the situation.
Step 4: Find and connect to a satellite
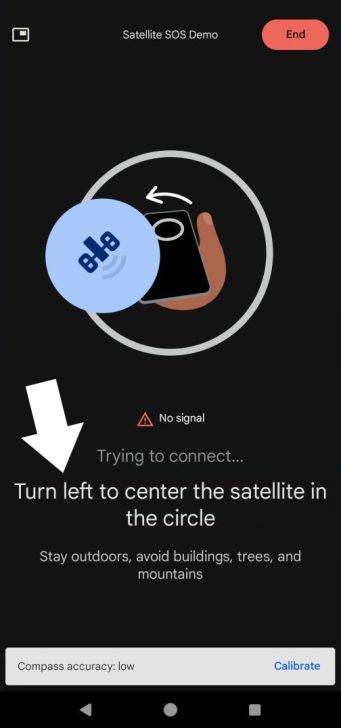
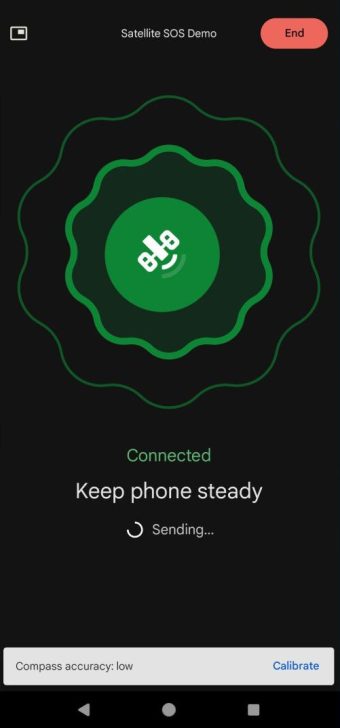
Instructions would then be provided on the screen where you would be asked to move your phone and try finding and connecting to a satellite. You have to align the movement with the circle in the center.
Step 5: Notification of connection
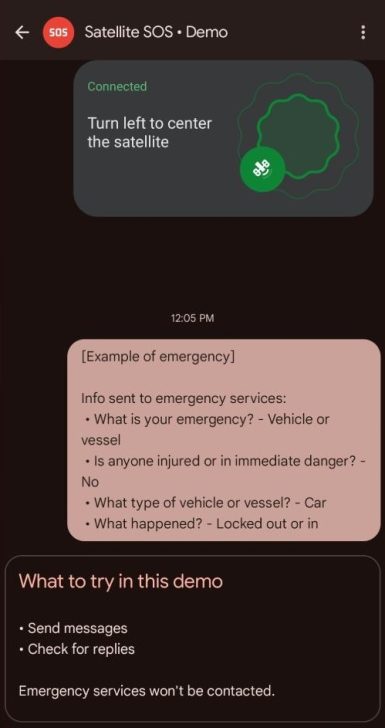
You will be notified when you find a satellite and connect to it. Once it is connected, a message that describes your situation will then be sent.
Step 6: Sending the initial message
In a dire situation, Garmin Response, which handles satellite SOS communication, would receive a message. When the initial message is sent, users are directed to the Google Messages app, where they can now engage in conversation through emergency services.
Step 7: Ending the SOS services
When you want to end the demo or are done with the required communication, you can end the session by selecting the End icon in the top right corner. If you still need help, a message will appear before the services are ended.
While this feature is of great use, users need to remember that the purpose of the Satellite SOS is mainly for emergencies and when other means of communication are not accessible. Google Pixel 9's inclusion of this safety feature was a ground-breaking move by the company.


