In your website’s Discussion Settings, you can control how people interact with your site through comments. This guide will explain each setting.
In this guide
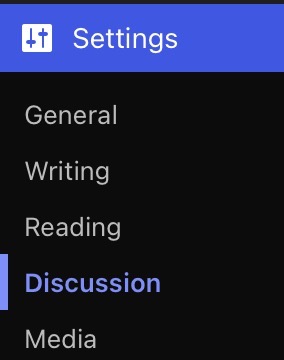
To change settings for commenting, comment moderation, markdown and avatars, follow these steps to access the Discussion settings:
- Visit your site’s dashboard.
- Navigate to Settings → Discussion.
In the Default post settings, you can set the following options for new posts or pages. These settings can be changed individually for each post.
- Attempt to notify any blogs linked to from the post: This determines if your blog will send out pingbacks to other blogs when you publish articles that link to those blogs.
- Allow link notifications from other blogs: This determines if your blog will accept pingbacks from other blogs that link to your blog.
- Allow people to submit comments on new posts: This option allows you to enable or disable comments on all new posts by default.
The Other comment settings section have quite a few options, so let’s explain them one at a time:
- Comment author must fill out name and email: When this setting is on, anyone leaving a comment will be forced to leave a name and a valid email address. If the setting is off, visitors can leave anonymous comments. While your commenters do not have to fill in the email field if you’ve turned this setting off, it will still be visible to them when they comment.
- Users must be registered and logged in to comment: If this option is enabled, only logged-in WordPress.com users will be allowed to leave comments. If it is not checked, any visitor can leave a comment.
- Automatically close comments on old posts: This setting can be used to shut down comments on articles that are a certain number of days old. After the number of days have passed, the post will not accept new comments.
- Show comments cookies opt-in checkbox: (plugin-enabled sites only) allowing comment author cookies to be set.
- Enable threaded (nested) comments: Turn on this option to allow visitors to reply to other comments inline/nested — a reply to a comment appears underneath it, slightly indented to the right. When turned on, it can allow for better discussions and responses. We suggest using a maximum of 3 levels deep. Anything higher and the theme layouts may not work as expected. Note: Enabling the setting only applies to new comments since existing comments don’t have any threading date. However, disabling this setting applies to all comments.
If your posts/pages get a lot of comments, you may want to split the comments into pages. You can choose how many top-level comments (nested comments are not counted and will not be split between pages) to show for each page. You can also choose to show the first or last page by default when a visitor first views the comments.
- Break comments into pages:
- Select number of top level comments per page.
- Comments page to display by default (last page or first page).
- Comments to display at the top of each page (older or newer).
Receive notifications for new activity on your site, and reduce spam comments through email notifications and comment moderation.
The E-mail me whenever options control when you get notified about new comments. You can choose to receive email notifications whenever:
- Anyone posts a comment.
- A comment is held for moderation.
- Someone likes one of your posts.
- Someone subscribes to your blog.
- Someone reblogs one of your posts.
You can choose what happens to a comment before it appears publicly on your site. You can enable or disable the following options:
- Comment must be manually approved: If this setting is on, all comments will go into moderation and they will need to be approved by an administrator before appearing on the blog.
- Comment author must have a previously approved comment: If this option is on, any visitors who have had a comment approved on the blog in the past will automatically have all future comments approved. Only comments from new visitors will go into moderation.
You can approve or reject comments before they appear on your site using the following comment moderation tools:
- Hold a comment in the queue if it contains __ or more links: A lot of spam comments include a large number of URLs, which could be unwanted. The default setting here is 2, and you can make this higher or lower. If you set this to 0, all comments will be held in moderation, which would be the same as checking Comment must be manually approved in the previous section.
- When a comment contains any of these words in its content, name, URL, e-mail, or IP address, it will be held in the moderation queue for you to approve or reject. Write one word or IP per line in the box, and click Save settings at the top of the comments section to save your changes. Comment moderation will match what is inside words too, so if you moderate for the word “press”, it would hold comments containing the text “WordPress.”
This is very similar to Comment Moderation described above, but when something matches here, the comment is deleted and sent to Trash instead of held for moderation.
- Use Markdown for comments: Enable this option so your visitors can format the text of their comments using markdown.
- Let visitors use a WordPress.com or Facebook account to comment: Your site’s comment form will include options to log in with WordPress.com and Facebook, so your commenter can identify themselves via their details on these platforms. Not currently supported on plugin-enabled sites.
- Allow Blocks: By enabling this option, your commenters can insert images, videos, and other blocks with their comments. By disabling the option, they can only comment with text. Not currently supported on plugin-enabled sites.
- Greeting Text: By default, the comments area of your site will say “Leave a comment” to prompt visitors to join the discussion. You can customize this text to say something different.
- Color Scheme: Adjust the color scheme of your site’s comment area, with choices for light, dark, and transparent.
- Avatar Display: Show or hide avatars of those who comment.
- Gravatar Hovercards: With this enabled, your readers can view commenters’ profiles by hovering their mouse over their profile picture.
- Maximum Rating: When a comment author’s avatar is displayed, you can limit the maturity level of an avatar to one of the following ratings: G, PG, R, X.
- Default Avatar: Choose a generic logo or a computer-generated avatar for users who don’t have their own custom profile picture. If a user comments on your blog but doesn’t have a WordPress.com avatar or an email address associated with Gravatar, this is the avatar that will be shown.
After changing any of these settings, click the “Save changes” button at the bottom of the screen.
This section of the guide applies to sites with the WordPress.com Business and Commerce plan, and the legacy Pro plan. If you have a Business plan, make sure to activate it. For sites on the Free, Personal, and Premium plans, upgrade your plan to access this feature.
Jetpack Subscriptions Settings: Change whether your visitors can subscribe to your posts or comments or both with a “follow blog” option in the comments form and a popup subscribe modal.
