Generating Word Cloud in Python | Set 2
Last Updated :
08 Jun, 2021
Prerequisite: Generating Word Cloud in Python | Set – 1
Word Cloud is a data visualization technique used for representing text data in which the size of each word indicates its frequency or importance. Significant textual data points can be highlighted using a word cloud. Word clouds are widely used for analyzing data from social network websites.
For generating word cloud in Python, modules needed are – matplotlib, pandas and wordcloud. To install these packages, run the following commands :
pip install matplotlib
pip install pandas
pip install wordcloud
To get the link to csv file used, click here.
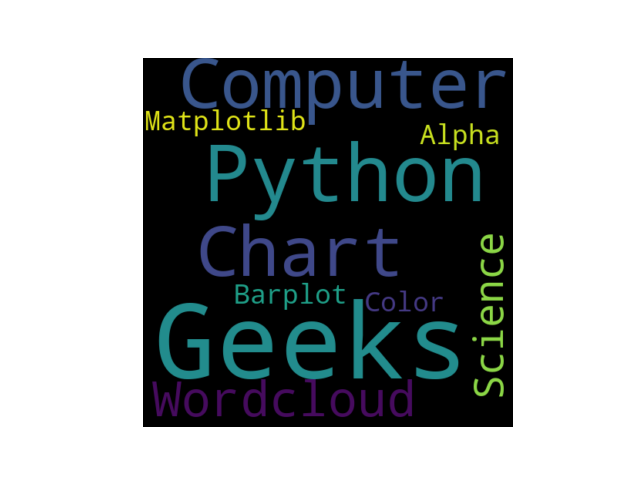
Code #1 : Number of words
It is possible to set a maximum number of words to display on the tagcloud. For this purpose, Use max_words keyword arguments of WordCloud() function.
Python3
from wordcloud import WordCloud
import matplotlib.pyplot as plt
import csv
file_ob = open(r"C:/Users/user/Documents/sample.csv")
reader_ob = csv.reader(file_ob)
reader_contents = list(reader_ob)
text = ""
for row in reader_contents :
for word in row :
text = text + " " + word
wordcloud = WordCloud(width=480, height=480, max_words=10).generate(text)
plt.figure()
plt.imshow(wordcloud, interpolation="bilinear")
plt.axis("off")
plt.margins(x=0, y=0)
plt.show()
|
Output:

Code #2 : Remove some words
Some words can be removed that we don’t want to show. For this purpose, pass those words to stopwords list arguments of WordCloud() function.
Python3
from wordcloud import WordCloud
import matplotlib.pyplot as plt
import csv
file_ob = open(r"C:/Users/user/Documents/sample.csv")
reader_ob = csv.reader(file_ob)
reader_contents = list(reader_ob)
text = ""
for row in reader_contents :
for word in row :
text = text + " " + word
wordcloud = WordCloud(width=480, height=480,
stopwords=["Python", "Matplotlib","Geeks"]).generate(text)
plt.figure()
plt.imshow(wordcloud, interpolation="bilinear")
plt.axis("off")
plt.margins(x=0, y=0)
plt.show()
|
Output:

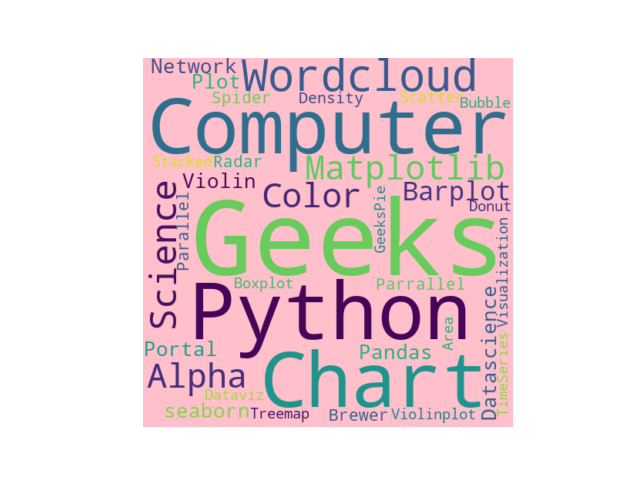
Code #3 : Change background
We can Change the color of the background of the wordcloud. For this purpose, use background_color keyword arguments of WordCloud() function.
Python3
from wordcloud import WordCloud
import matplotlib.pyplot as plt
import csv
file_ob = open(r"C:/Users/user/Documents/sample.csv")
reader_ob = csv.reader(file_ob)
reader_contents = list(reader_ob)
text = ""
for row in reader_contents :
for word in row :
text = text + " " + word
wordcloud = WordCloud(width=480, height=480, background_color="pink").generate(text)
plt.figure()
plt.imshow(wordcloud, interpolation="bilinear")
plt.axis("off")
plt.margins(x=0, y=0)
plt.show()
|
Output:

Code #4 : Change color of words
We can change the color of words using colormap keyword arguments of WordCloud() function.
Python3
from wordcloud import WordCloud
import matplotlib.pyplot as plt
import csv
file_ob = open(r"C:/Users/user/Documents/sample.csv")
reader_ob = csv.reader(file_ob)
reader_contents = list(reader_ob)
text = ""
for row in reader_contents :
for word in row :
text = text + " " + word
wordcloud = WordCloud(width=480, height=480, colormap="Oranges_r").generate(text)
plt.figure()
plt.imshow(wordcloud, interpolation="bilinear")
plt.axis("off")
plt.margins(x=0, y=0)
plt.show()
|
Output:

Code #5 : Maximum and minimum font size
We can control minimum and maximum font size of the wordcloud. For this purpose, use max_font_size, min_font_size keyword arguments of WordCloud() function .
Python3
from wordcloud import WordCloud
import matplotlib.pyplot as plt
import csv
file_ob = open(r"C:/Users/user/Documents/sample.csv")
reader_ob = csv.reader(file_ob)
reader_contents = list(reader_ob)
text = ""
for row in reader_contents :
for word in row :
text = text + " " + word
wordcloud = WordCloud(width=480, height=480, max_font_size=20, min_font_size=10).generate(text)
plt.figure()
plt.imshow(wordcloud, interpolation="bilinear")
plt.axis("off")
plt.margins(x=0, y=0)
plt.show()
|
Output:
