Who is ready for a furniture makeover tutorial? I haven’t had one of those in a while, but you can find a bunch of old ones HERE! If you’re new here, working on furniture used to be my specialty. I do refinishing, painting, upholstery, repair, slipcovers, and all types of rehab. When I moved to Minnesota, though, I shut down that part of my business and I only work on pieces here and there for my own home. I do still enjoy it to a point, but it’s not what I want to do all day every day anymore. After working on this table, my back and arms confirmed that! So, I bought this beautiful antique baker’s table at Lucketts to use as our new kitchen island. I knew that I didn’t want the black-painted base, but I also knew that was something I could address pretty easily. While I usually don’t like to splurge on pieces that need work to make them fit my aesthetic, this table top was worth a little work. So, I worked on it over a couple of days and I thought I would share a tutorial on stripping antique pine.
First of all, here is the table…

Typically, the top is what needs to be refinished, but in this case, I just needed to work on the legs and apron. I say “just”, but the legs are really the worst part to have to sand and strip, so I typically avoid them if possible!
I was exhausted when we got home from Lucketts, but I could hardly wait to see how the black paint would come off and what was underneath. I took a fine sanding sponge and just rubbed it over the surface gently to reveal an old layer of mustard-colored paint on the legs and cream paint on the apron. I liked the mustard color and thought I might just gently sand off the black and leave that older paint layer mostly intact.

I started the process by hand sanding, but it was pretty slow, so I pulled out the orbital sander. When stripping antique pine or any soft wood, you want to be very gentle while sanding. If you use heavy grit sandpaper (the lower the number on the sandpaper, the grittier the texture), it could leave orbital sanding marks and/or an uneven surface. It’s best to start with a finer grit paper (120-220) and let the process take a little longer.
Sanding the apron and flat areas on the legs was pretty easy, but sanding the legs was a challenge, so I decided to wait until the next nice day and use paint stripper to get into the nooks and crannies of the turned legs.
As a side note, you can strip off a paint finish manually (through sanding) or chemically (through strippers.) There isn’t a right or wrong way to remove the paint, but it depends on the desired end result and which kind of mess you prefer. When I was sanding this table, I thought I would prefer stripping so I didn’t have to mess with the dust. When I was stripping this table, I might want to go back to sanding so I didn’t have to contend with the goop! The grass is always greener. The truth is that either way is messy and time-consuming. I ended up stripping this antique pine table with a mix of both. Sanding, stripping, then sanding again.

After the initial sanding, I decided I didn’t like the mottled look of the old layers of paint. It was a cool effect, but not really the look I was going for. I decided to take it all the way down to the raw wood and then apply a clean finish to bring out the warmth and natural beauty of the old wood.
I did find a few surprises when I was sanding. First, this table was already modified and put on wood risers. They are so solid and sturdy that I didn’t even notice until I was sanding. They were very well done. I also noticed that one of the drawers was made out of new wood as a replacement. The rest of the table seems to be original, although it’s possible the shelf pieces were a more recent addition, too, although the wood is old.

You can see how the right drawer is made of a different wood. I’m not sure what it is, but it isn’t pine! I’m just going to let it be what it is, though, and put a clear coat on it along with the old pine. I did explore removing the knobs, but they are pegs that are glued in place, so it’s not a simple process if I do want to change then out.

So, yesterday, I took advantage of the beautiful weather and started chemically stripping the rest of the paint on the antique pine baker’s table. My favorite paint & varnish stripper is , but I couldn’t find it locally and my order hadn’t arrived, yet, so I impatiently decided to work with . I like using a paste stripper as opposed to a gel or liquid because it doesn’t slide off of vertical surfaces as easily. After using both of these paste products, my preference is still for Ready Strip. It’s a dryer paste and doesn’t create such a wet goop. Some of the consistency of the “goop” will depend on the kind of paint or varnish you’re removing in addition to the chemical stripper, but starting with a dryer product does help a lot. HERE is a post showing when I used to strip a tabletop a few years ago.
With all of that said, here is a step-by-step tutorial for stripping antique pine…
stripping antique pine | supplies needed

- Chemical paint stripper ( is what I used, but is my favorite.)
- 2-3″ natural chip brush
- putty knife
- paper towels or shop towels
- heavy-duty rubber gloves (Kitchen dish gloves are perfect. The solvent-resistant black latex gloves are too thin and will tear when scrubbing)
- empty metal paint can
- hose with a shower nozzle
- orbital sander
- 120, 180, 220 sandpaper
stripping antique pine | applying the chemical stripper
Use a natural chip brush to apply the chemical stripper to the painted/finished area. (Do not use a synthetic brush as the chemical stripper can break down the bristles and turn them into goop. Ask me how I know.) Follow the manufacturer’s instructions for how long to let the solution sit before moving on to the next step. Here are a couple of tips I’ve learned over the years…
- If you’re new to stripping furniture, I would suggest starting with one small section to get a feel for the process. Applying a chemical stripper to the entire piece might end up giving you more work than you have the time or energy for.
- Apply the chemical stripper in small sections if it’s a hot, sunny, and/or dry day. These conditions will make the solution evaporate and dry out quicker, making it more difficult to remove. If these are the conditions you’re working under or you have to leave the chemical stripper on the piece for an extended period, wrap it with plastic wrap to hold in the moisture.

Most chemical strippers take about 30 minutes to start working, but I like to check about every 10 minutes to see how things are coming along.

stripping antique pine | removing the paint/finish
As I mentioned in the supply list, wear heavy-duty rubber gloves for this part. I was just wearing nitrile gloves and they tore when I started scrubbing. It’s also a good idea to wear a smock and eye protection just in case.
If you’re removing the chemical stripper and finish from a flat surface, a putty knife is the best to use. Just scrape in rows, wiping the removed product onto a paper towel. Once the paper towel is full, dispose of it in the empty metal paint can. Repeat this process for all flat areas.
To work on carved or turned details along with any tight edges and corners, scrub the area with a heavy-duty stripping pad. Use a small wire brush to get into tight corners and small crevices that can’t be reached with the pad. If the stripping product/paint/finish mixture isn’t moving well, spay on some Finishing Cleaner to loosen it up.

Once the entire area is scrubbed, scrub it again with the stripper finish pads and then a scrubbing sponge. Each pass with different sponge types, working from rough to fine, removes more of the product. You may find with your finish that only one or two passes are required, but mine was pretty goopy!

I will tell you that black and mustard paint mixed with an orange chemical stripper does not make an appetizing color. I was having flashbacks to all of the different diaper changes Jeff and I encountered as parents. The up-and-out, the super soaker, and, the worst of all, the poo-nami. But, I digress.
During this scrubbing process, it does help to have 2-3 of each pad or sponge handy to use when one gets completely clogged or saturated. You can also hose off the goop to keep them working for a bit longer.
The final step of this part of the process is to wipe away the excess paint and goop with a paper towel or shop towel. You can hose it off, but I like to wait to do that until more of the goop is removed. I wipe and scrape off as much as I can and put all of the waste into the metal paint can. Once I’m done with the job, all of my gloves, brushes, and used sponges go in the paint can, I fill it with water, and put on the lid to dispose of it. Check with your local paint store or recycling center for proper disposal of paint and paint waste.

(That black lump in the photo above is Sebastian taking a nap in the grass.)
At this stage, if you’re still seeing paint and finish that you want to remove, apply another coat of stripper and repeat the process.
stripping antique pine | wash & sand the piece
Once I finish a section, one leg, for example, I would spray GreenEZ cleaner onto the leg and let it sit while I worked on removing paint from other areas of the table. Once everything was scrubbed and scraped, I scrubbed each section with a Dobie sponge and more GreenEZ cleaner until all of the residue and stickiness were gone. You can use Mineral Spirits to remove this residue as well, but the GreenEZ cleaner is effective and definitely a more gentle approach. After scrubbing each section, I would hose it down to rinse away the cleaner and residue. Hosing down a piece of furniture seems counterintuitive, but it really is the best way to get it cleaned after the mess of stripping.

There are still a few remnants of paint hanging on in the tight spaces of the legs, but I feel like I can live with those. It was a nice day, so I just let the table sit on the driveway in the sun to dry. I also put an industrial fan on it to help things along.
Once the table was completely dry, I could move on to sanding. I just did a light sanding over the entire piece with 220-grit paper. This helps to smooth out any splinters, rough edges, or grain that was raised from being wet.
If you notice, the new wood risers added to the table retained the black paint. I got a bit of it off, but it was raw wood, so it really soaked in the paint. When I look at the table as a whole, though, the black feet look okay, so I didn’t feel the need to work on them further. We may end up adding more height to the piece, so we can always address that down the road if we want to.

Now, I just need to apply a finish to bring out the luster of the wood! I would suggest waiting a day or two before painting, staining, or finishing a piece you’ve just stripped, washed, and sanded. You just want to make sure it’s completely dry and ready to accept a new finish before rushing into the next step.

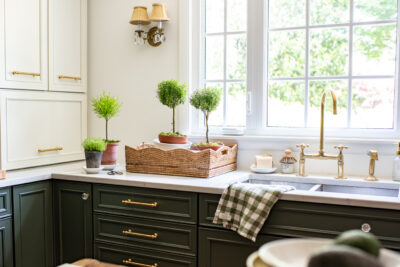
And, I bet you’re wondering what has been happening in the kitchen! Well, it’s been a little quiet in the kitchen because they were taking advantage of the weather to work on the pool, but we did get the frame of the range hood installed…

And the new refrigerator was installed. It still needs the cabinet above, the paneled doors, and the side piece, but it is bolted to the wall and ready to be used. I don’t want to fill it until they are done with it, but we have started using the in-fridge water and ice maker and it is glorious!! I can’t tell you how much I’ve missed having cold filtered water at the push of a button and to just be able to scoop ice into my water thermos. It’s definitely a modern luxury, but I appreciate it so much more after filling and cracking old-school ice trays and having to refill a filtered water pitcher every other day.

Today, the propane is being installed for the range and more work will happen around the fridge area.
Since this post is about stripping antique pine, let me know if you have any questions on the tutorial or any other tips to share!


Wow, a reminder to me that I do NOT want to ever have to strip a piece of furniture! Am I reading this correctly that you are are leaving the table as is in its wood condition and not painting it again?
Yep, that’s right. I am not going to paint it.
Who are you and what did you do to Marian? LOL
How will you exhaust from the range hood? (I don’t see any wall or ceiling opening to accommodate the exhaust to the outdoors…no doubt that’s been planned for?)
Good question! The electrical and duct were covered up by the new drywall, but they are still in the ceiling and will be connected to the new range hood.
So glad you are NOT painting it!!! It’s called PATINA!
I was stripping a five panel door and managed to make a HUGE dried mess of it. I’d be interested in hearing how to fix those kinds of mistakes! Do you just reapply and keep going?
I have been there!! If the stripper has hardened along with any paint or varnish you were trying to strip, I would put on a new coat of stripper, but this time working in small sections so that doesn’t happen again.
Thank you!!
What are the dimensions of that great table? I missed them if you’ve mentioned them.
I think it’s 6 1/2′ long, 31″ wide, and 32″ tall. I just bought it at Lucketts on Friday and shared a bit more about it in yesterday’s blog post.
What stove did you purchase? It is absolutely gorgeous!
It is a Ilve Nostalgie 48″ range. And yes, it is gorgeous! The entire kitchen is designed around it.
I have an original 1924 door that I want to strip. Exterior is painted, interior has a stai /resin over it. Would you recommend the paste or sanding or a bit of both?
It depends on the kind of mess you want to deal with and also the level of detail on the door. If the door is flat and after some test sanding, the finish wears off easily, then sanding might be a good option. If there are lots of tight spots and detail, stripping is going to get into those areas better than sanding. You may end up doing a combination as I did with this table.
Hi, Molly, I’d like to offer some advice on stripping your antique door. Hopefully, I’m not stepping on Marian’s toes here! I have stripped more than 20 antique doors over the last 25 years both for my own 1911 foursquare home and for others. I also sell antique doors and other architectural salvage on Marketplace. Let’s start with the interior side of your door. Most antique doors were finished with shellac. If your door has never been previously refinished, it is a very high likelihood that it has a shellac finish. Shellac is dissolved in alcohol to apply the finish……and alcohol can also remove it! First, if your door has glass, tape off the edges of the glass to protect the glass from scratches. To remove a shellac finish, I put denatured alcohol in a spray bottle, spray a small area, rub/scrub the area with medium coarse steel wool in the direction of the wood grain to loosen the finish, spritz lightly again, and wipe with a paper towel. Work in small areas because the alcohol evaporates VERY quickly. Make sure you’re working in a well ventilated area. Repeat until the finish is removed to your liking. Place the used paper towels and steel wool (you may need multiple pieces) in an open trash can outside and let the alcohol evaporate. Once the finish is fully removed, sand the door with 150 and 220 grit sandpapers and apply the stain and/or finish of your choice. The beauty of denatured alcohol is that it won’t raise the grain of the wood, unlike many “safe” strippers, and you won’t have as much finish sanding to do. You can purchase denatured alcohol (ethanol with a denaturing agent to make it unfit for consumption) in the stripper/solvent section at the hardware store. The can may also be labeled as “Fuel”. I just purchased a gallon today at HD for $21.
Now for the painted exterior side of your door. The exterior side may also have shellac under the paint. What is your goal for the exterior side of the door? Do you want to completely remove the paint so you get back to the original wood and highlight it with a clear coat finish? Or do just want to remove enough of the paint so you can smooth out the under layers and repaint? I typically start by using a heat gun and putty knife to remove the paint and some of the shellac from all the flat sections of the door (don’t get too close to the glass with the heat gun!) There are some tricks to using the heat gun effectively so message me if you have any questions. I then use the denatured alcohol and steel wool method on those areas. For the detailed trim moulding and/or close proximity to glass, I use a chemical stripper and steel wool to remove the paint/shellac followed by a good sanding. Or you could just use chemical stripper alone on the whole exterior side of the door, followed by a good sanding. If your goal is just to smooth the surface so you can repaint, then sanding alone may work.
Sorry for the long-winded reply. Feel free to reach out if you want more tips on stripping your door.
P.S. The denatured alcohol/steel wool stripping method will also work on many antique furniture pieces since most of them were finished with shellac. It’s also safe for old veneers since the alcohol will not dissolve the old water-soluble veneer glue. As an added bonus, the alcohol can also help deodorize the furniture.
Thank you so much for taking the time to share your experience! I’m sure that will be very helpful for those working on antique doors.
Patricia AND Marion Want to remove paint from wood door facing but leave the shellac in place. Any thoughts?
Terry, Is the door fully painted over the original shellac? Or are these paint spatters on the original shellac? If fully painted, unfortunately, I don’t know of anyway to remove only the paint and leave the shellac. All the paint strippers I’ve used remove paint, polyurethane, and shellac. A heat gun that is hot enough to soften/bubble the paint will also melt shellac (melting point somewhere between 160-170F). If they are paint spatters on the shellac, you could try dabbing just the paint spatters with alcohol until they soften and can be gently scraped off with a fingernail, with a plastic putty knife or even with a razor blade (be extra careful with a razor blade as it’s easy to gouge the wood).
How timely as I just dug out some old doors to redo. I remember your past life in furniture and will follow your expert lead and product recs – work smarter not harder!
Eager to hear how you like the fridge and the model you chose. Thats the next big ticket project here – finishing our kitchen.
Love the new table!
That range is beautiful! I love the green cabinetry so far and I can’t wait to see the finish on the table!!!
I can see why you fell in love with that tabletop. It’s gorgeous. Lots of tales held there in that grain and markings. The rest is nice, too, but that top is what does it for me.
I was noticing the beautiful new floors in your pictures. Just gorgeous. I’m surprised you are not going to paint the legs of the table. Maybe too much wood against the wood? Can’t wait to see it all finished and styled!
OH. Can’t lie. I loved the black part of your new “island.” I was disappointed you didn’t keep it that way. I really thought it’d go so well with your new green cabinets. ( I love some black in any room, though. Just not a black and white room, funnily. ) It does look like it needs to be painted something, though. All those different woods takes a bit away from the beauty of the shape.
And I know your island will be great in your kitchen however you decide to have it. Your new range is scrumptious.
I was thinking the same thing about the black legs and apron. The contrast between the black and the wood floors would really show off the lovely shape of the legs. The black would also look pretty against the green cabinetry. There are interior designers who say that you should have some black in every room, but to each his own!
Well, it’s not finished, yet. Putting a finish on will darken the wood and make it match the top better and, the nice thing is, I can always paint it down the road if I want to. The black paint wasn’t very well done (it just rubbed off) and it felt a little sticky in places. I felt like this piece needed a fresh start and I’ll go from there.
Just adding my two cents here:-) I also liked the black base and legs and was hoping you might keep it! To me, there’s just something special about a black farmhouse table…I envision myself in the French countryside, baking bread on my farmhouse table while looking outside at the lavender that is growing in the fields:-)…That being said, this is your fabulous new kitchen and I know whatever you decide to do it will be awesome! Everything looks fantastic and the install is moving right along it seems (x the new window issue)!
The table is amazing!
A beautiful island it will be!!
I loved the black base on your table, I hope the stripped wood turns out just the way you want it.
I have to agree that the black base on the table was really a good contrast to
the gorgeous top. All of your hard work stripping it took the character away. The base just isn’t very interesting now – too much of the same color- Sorry!
I believe that “newer” right drawer that was remade is….just plain old ply wood. It may not look right after you put a clear coat on it…it might be too obvious of a contrast….but things do age and need to be replaced.
I loved the black finish the way it was. Did you try it first in the kitchen? I think it would have looked great with with the cabinets and the steely look of the GORGEOUS stove. Besides…NOBODY will be looking at those legs with that stove!!! Your vision always works out.
Ok . . . Everytime I see those stunning green cabinets I literally SWOON!
I LOVE the table and automatically visualized it in your
“Farmhouse White” heavily distressed underneath before I knew you weren’t going to paint it. And please don’t go by me, You have the best taste and eye of any of us! But can’t you just picture the lovely contrast of the farmhouse white with the cabinets and your floor? And maybe some of your copper items? Dreamyyyyyyy goodness!
Can’t wait to see what you do . . . .Also It was so fun to see you Rehab a piece even though it’s not your most fun thing anymore . . . . Thanks for sharing it with us💚
Much Love and Progress this week for you all.
I love the table! It is going to look beautiful!
SWOON Worthy! Have you seen the green Devol kitchens? Yours is taking shape just like them! Your ILVE range is gorgeous!!! I am so excited to get ours in our new build. I LOVE the double bar in the Nostalgie! I hear there is a learning curve to learn to cook with it, but reviews show such positive things. It’s dreamy! OH, and your table/ island has so much charm. Stripping furniture is one of my VERY least favorite things to do. The process is arduous any way you do it, but the results are worth it. Thanks for sharing!
PS: I thought Sebastian was a pile of mulch yet to be laid! 🙂
you can buy on line, felt covered rollers for your table legs. when we put hardwood flooring in we bought these for our antique table , love them
love this table , they also make a white wax that will help keep the table from going to red side
I’m so happy you stripped this. It’s so gorgeous. I have been looking and looking for something exactly like this. You nailed it!!!!
When we closed my folks house I brought home quite a lot of pieces to refinish. I have used almost every chemical over the years but I tripped over Blue Bear products. They are soy based and work great while being safer to use. If you haven’t used then give them a try in the future. NAYY That range, beautiful. The table amazing. I enjoy watching your transformations.
the black remaining on the leg extensions made me think that your table has little hooves and that you need to name her Bessie (as in Bessie the Cow).
I am obviously sleep deprived and will soon be heading to bed.
The black table base was a nice touch, and I wish you the best of luck with the stripped wood.