South African War
- Also called:
- Boer War, Second Boer War, or Anglo-Boer War; to Afrikaners, also called Second War of Independence
- Date:
- October 11, 1899 - May 31, 1902
- Location:
- South Africa
- Participants:
- Orange Free State
- South African Republic
- United Kingdom
- Context:
- British Empire
- Western colonialism
- Major Events:
- Peace of Vereeniging
- Siege of Mafeking
- On the Web:
- Weapons and Warfare - Boer Forces (Dec. 21, 2024)
South African War, war fought from October 11, 1899, to May 31, 1902, between Great Britain and the two Boer (Afrikaner) republics—the South African Republic (Transvaal) and the Orange Free State—resulting in British victory.
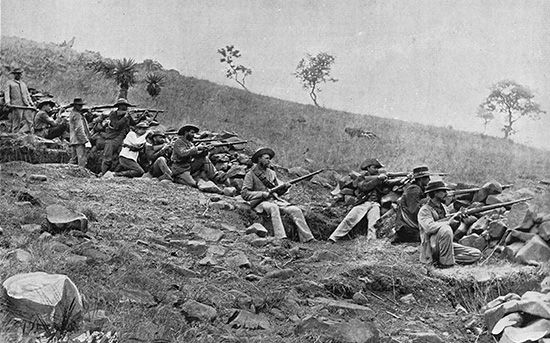
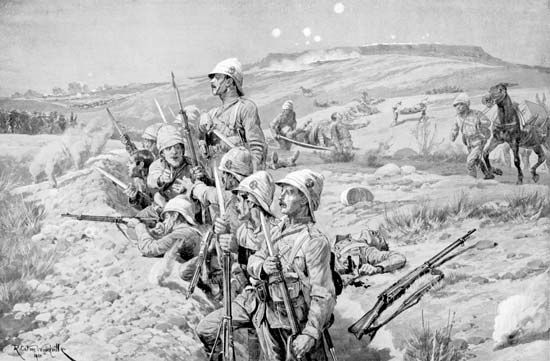
Although it was the largest and most costly war in which the British engaged between the Napoleonic Wars and World War I (spending more than £200 million), it was fought between wholly unequal protagonists. The total British military strength in Southern Africa reached nearly 500,000 men, whereas the Boers could muster no more than about 88,000. But the British were fighting in a hostile country over difficult terrain, with long lines of communications, while the Boers, mainly on the defensive, were able to use modern rifle fire to good effect at a time when attacking forces had no means of overcoming it. The conflict provided a foretaste of warfare fought with breach-loading rifles and machine guns, with the advantage to the defenders, that was to characterize World War I.
Underlying causes
The causes of the war have provoked intense debates among historians and remain as unresolved today as during the war itself. British politicians claimed they were defending their “suzerainty” over the South African Republic (SAR) enshrined in the Pretoria and (disputably) London conventions of 1881 and 1884, respectively. Many historians stress that in reality the contest was for control of the rich Witwatersrand gold-mining complex located in the SAR. It was the largest gold-mining complex in the world at a time when the world’s monetary systems, preeminently the British, were increasingly dependent upon gold. Although there were many Uitlanders (foreigners; i.e., non-Dutch/Boer and in this case primarily British) working in the Witwatersrand gold-mining industry, the complex itself was beyond direct British control. Also, the discovery of gold on the Witwatersrand in 1886 allowed the SAR to make progress with modernization efforts and vie with Britain for domination in Southern Africa.
After 1897 Britain—through Alfred Milner, its high commissioner for South Africa—maneuvered to undermine the political independence of the SAR and demanded the modification of the Boer republic’s constitution to grant political rights to the primarily British Uitlanders, thereby providing them with a dominant role in formulating state policy that would presumably be more pro-British than the current policy of the SAR. In an effort to prevent a conflict between Britain and the SAR, Marthinus Steyn, president of the Orange Free State, hosted the unsuccessful Bloemfontein Conference in May–June 1899 between Milner and Paul Kruger, president of the SAR. Kruger did offer to make concessions to Britain, but they were deemed insufficient by Milner. After the conference, Milner requested that the British government send additional troops to reinforce the British garrison in Southern Africa; they began arriving in August and September. The buildup of troops alarmed the Boers, and Kruger offered additional Uitlander-related concessions, which were again rejected by Milner.
The Boers, realizing war was unavoidable, took the offensive. On October 9, 1899, they issued an ultimatum to British government, declaring that a state of war would exist between Britain and the two Boer republics if the British did not remove their troops from along the border. The ultimatum expired without resolution, and the war began on October 11, 1899.
War
Initial Boer success
The course of the war can be divided into three periods. During the first phase, the British in Southern Africa were unprepared and militarily weak. Boer armies attacked on two fronts: into the British colony of Natal from the SAR and into the northern Cape Colony from the Orange Free State. The northern districts of the Cape Colony rebelled against the British and joined the Boer forces. In late 1899 and early 1900, the Boers defeated the British in a number of major engagements and besieged the key towns of Ladysmith (now uMnambithi), Mafeking (now Mahikeng), and Kimberley. Particularly of note among Boer victories in this period are those that occurred at Magersfontein, Colesberg, and Stormberg, during what became known as Black Week (December 10–15, 1899).
British resurgence
Kruger’s October 1899 offensive had taken the British by surprise, and it accounts for the early Boer victories. However, the arrival of large numbers of British reinforcements by early 1900 made an eventual Boer defeat inevitable. In this second phase the British, under Lords Kitchener and Roberts, relieved the besieged towns, beat the Boer armies in the field, and rapidly advanced up the lines of rail transportation. Bloemfontein (capital of the Orange Free State) was occupied by the British in February 1900, and Johannesburg and Pretoria (capital of the SAR) in May and June. Kruger evaded capture and went to Europe, where, despite the fact that there was much sympathy for the plight of the Boers, he was unsuccessful in his attempts to gain viable assistance in the fight against the British.
Boer guerrilla warfare and the British response
At the end of 1900 the war entered upon its most destructive phase. For 15 months, Boer commandos, under the brilliant leadership of generals such as Christiaan Rudolf de Wet and Jacobus Hercules de la Rey, held British troops at bay, using hit-and-run guerrilla tactics. They harried the British army bases and communications, and large rural areas of the SAR and the Orange Free State (which the British had annexed as the Crown Colony of the Transvaal and the Orange River Colony, respectively) remained out of British control.
Kitchener responded with barbed wire and blockhouses along the railways, but when these failed he retaliated with a scorched-earth policy. The farms of Boers and Africans alike were destroyed, and the inhabitants of the countryside were rounded up and held in segregated concentration camps, often under horrific conditions; several thousand died during their incarceration. The plight of the Boer women and children in the carelessly run, unhygienic camps became an international outrage, attracting the attention of such humanitarians as British social worker Emily Hobhouse.
The commandos continued their attacks, many of them deep into the Cape Colony, with Gen. Jan Smuts leading his forces to within 50 miles (80 km) of Cape Town. But Kitchener’s drastic and brutal methods slowly paid off. Boer resistance was worn down and led to divisions between the bittereinders (“bitter-enders”), who wanted to continue fighting, and the hensoppers (“hands-uppers”), who voluntarily surrendered and, in some cases, worked with the British.

