GarageBand User Guide
- Welcome
-
- Play a lesson
- Choose the input source for your guitar
- Customise the lesson window
- See how well you played a lesson
- Measure your progress over time
- Slow down a lesson
- Change the mix of a lesson
- View full-page music notation
- View glossary topics
- Practise guitar chords
- Tune your guitar in a lesson
- Open lessons in the GarageBand window
- Get additional Learn to Play lessons
- If your lesson doesn’t finish downloading
- Touch Bar shortcuts
- Glossary
- Copyright

Intro to arranging in GarageBand on Mac
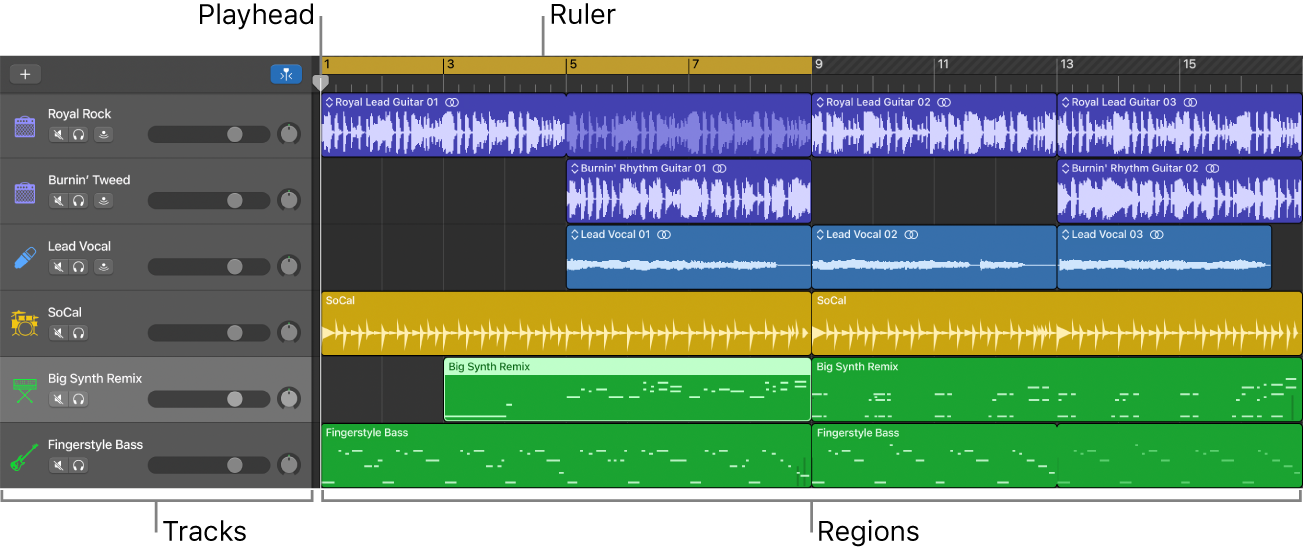
The Tracks area, located in the centre of the GarageBand window, is where you arrange regions to build your project. The Tracks area shows a visual representation of time moving from left to right. You build your project by arranging regions in rows, called tracks, that run from the beginning to the end of the Tracks area.
At the top of the Tracks area, the ruler shows units of time in either musical format (bars and beats) or standard time format (minutes and seconds). You can position regions with the ruler; snap regions and other items to the grid to precisely align them with bars, beats, or other (time) divisions; and use alignment guides to align them with other items in the Tracks area.

The playhead extends from the top to the bottom of the Tracks area, and moves as the project plays, showing the point currently playing in the project. At the top of the playhead is a triangle that you can drag to move the playhead to a different part of the project.
You can scroll to see another part of the project, zoom in for precise editing, or zoom out to see more of the project.
You can also add arrangement markers to a project, and use them to organise the project into sections. For information about using arrangement markers, see Add arrangement markers in GarageBand on Mac and Edit arrangement markers in GarageBand on Mac.